
制作自己的CocoaPods库
准备工作
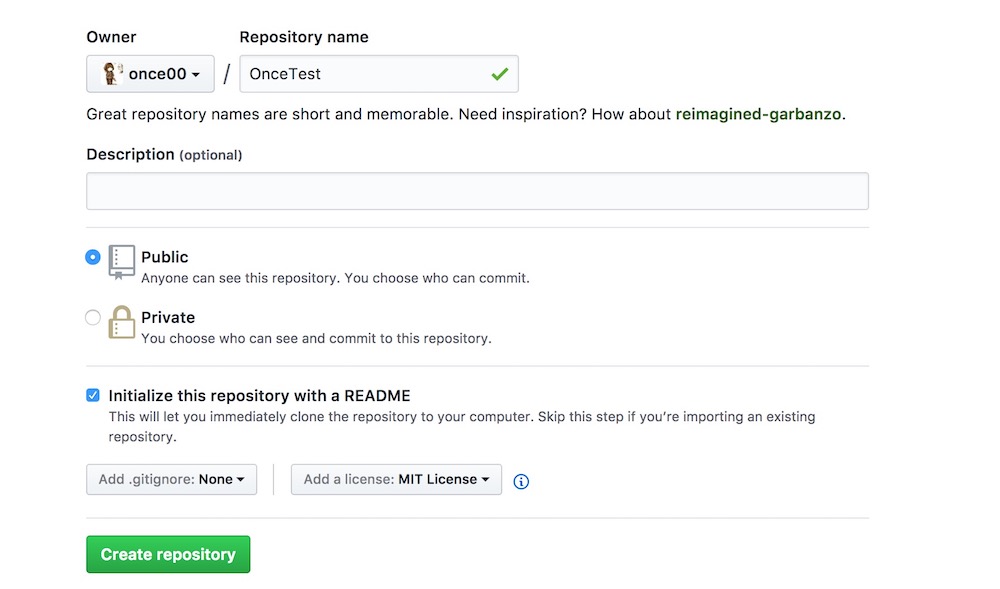
1. 你知道的cocoapods是托管在github上,所以第一步就是打开你的github,创造一个仓库。
2. 接下来我们clone 到本地:git clone https://github.com/once00/OnceTest
3. 进入到OnceTest目录下你会看到LICENSE和README.md文件。我们在当前目录下现在建立一个为OnceTestDemo的工程,并添加继承NSObject的类OnceTestManager,方便测试我们添加了一个doSomething方法
#import @interface OnceTestManager : NSObject
- (void)doSomething;
@end
#import "OnceTestManager.h"
@implementation OnceTestManager
- (void)doSomething {
    	NSLog(@"doSomething");
}
@end
4. 在OnceTest目录下我们添加OnceTest目录,在OnceTest目录下添加Classes和Assets目录来存放相关类和相关图片资源(假如我们当前库需要一张图片)
5. ,返回到OnceTest跟目录,制作OnceTest.podspec文件pod spec create OnceTest
OnceTest.podspec包括内容
Pod::Spec.new do |s|
  s.name         = 'OnceKit'
  s.summary      = '一个集成常用扩展的类库'
  s.version      = '1.0.1'
  s.license      = { :type => 'MIT', :file => 	'LICENSE' }
  s.authors      = { 'once00' => 	'love521943@hotmail.com' }
  s.social_media_url = 'http://onceo.me/'
  s.homepage     = 'https://github.com/once00/OnceKit'
  s.platform     = :ios, '6.0'
  s.ios.deployment_target = '6.0'
  s.source       = { :git => 'https://github.com/	once00/OnceKit.git', :tag => s.version.to_s }

  s.requires_arc = true
  s.source_files = 'OnceKit/**/*.{h,m}'
  s.public_header_files = 'OnceKit/**/*.{h}'

  #non_arc_files = 'YYCategories/Foundation/	NSObject+YYAddForARC.{h,m}', 'YYCategories/	Foundation/NSThread+YYAdd.{h,m}'
  #s.ios.exclude_files = non_arc_files
  #s.subspec 'no-arc' do |sna|
  #  sna.requires_arc = false
  #  sna.source_files = non_arc_files
  #end

  s.libraries = 'z'
  s.frameworks = 'UIKit', 	'CoreFoundation' ,'QuartzCore', 'CoreGraphics', 	'CoreImage', 'CoreText', 'ImageIO', 'Accelerate'
  s.dependency 'MJRefresh', '~> 3.1.1'
  #s.dependency 'MBProgressHUD', '~> 1.0.0'

end
创建trunk账号
1. 检测本机是否有trunk账号
pod trunk me
2. 注册trunk账号
pod trunk register *youremail*@gmail.com '*yourname*' --description='say something' --verbose
3. 对应邮箱会有邮件,点击确认就可以
准备推送
1. 验证.podspec文件是否合法pod spec lint OnceTest.podspec --allow-warnings
2. 提交代码到github并打上标签(回到git目录)
git add -A && git commit -m "创建版本 1.0.1."
git tag '1.0.1'
git push --tags
git push origin master
3. 通过trunk推送podspec文件pod trunk push OnceKit.podspec --allow-warnings
成功会显示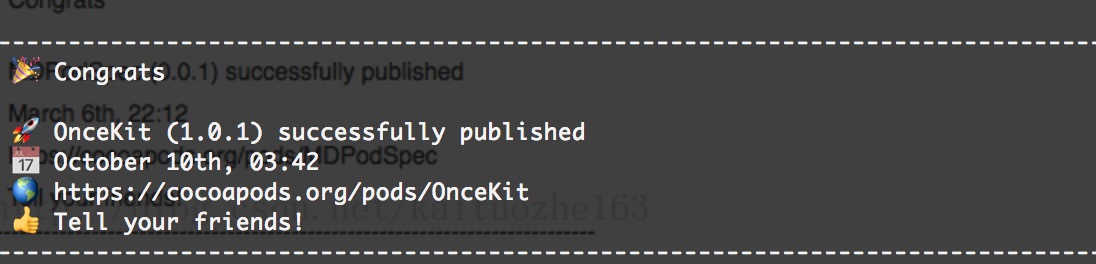
4. 更新CocoaPods库
pod setup
注意
1. pod search无法搜索到类库的解决办法
- 删除~/Library/Caches/CocoaPods目录下的search_index.json文件
- 删除成功后再执行pod search
每次更新版本步骤
git add -A && git commit -m "创建版本 1.0.1."
git tag '1.0.1'
git push --tags
git push origin master
pod spec lint OncePay.podspec --verbose --use-libraries --allow-warnings

pod spec lint OnceKit.podspec --allow-warnings
pod trunk push OncePay.podspec --verbose --use-libraries --allow-warnings

pod trunk push OnceKit.podspec --allow-warnings
pod setup
注意
- 引用静态库:“(.ios).library”。去掉头尾的lib,用“,”分割 。注意: (.ios)括号括起来代表可以省略
// 引用libxml2.lib和libz.lib.spec.libraries = 'xml2', 'z' - 引用公有framework:”(.ios).framework” 用”,”分割. 去掉尾部的”.framework”
spec.frameworks = 'UIKit','SystemConfiguration', 'Accelerate' - 引用自己生成的framework:’(.ios).vendored_frameworks’ 用”,”分割 路径写从.podspec所在目录为根目录的相对路径 ps:这个不要省略.framework spec.ios.vendored_frameworks = ‘Pod/Assets/*.framework’
- 引用自己生成的.a文件, 添加到Pod/Assets文件夹里. Demo的Example文件夹里也需要添加一下, 不然找不到
spec.ios.vendored_libraries = ‘Pod/Assets/*.a’
- 注意:在提交到私有仓库的时候需要加上–use-libraries
source_files:写法及含义建议大家写第一种或者第二种
"OnceTest/*
"OnceTest/OnceTest/*.{h,m}"
"OnceTest/**/*.h"
-
*表示匹配所有文件 -
*.{h,m}表示匹配所有以.h和.m结尾的文件 -
**表示匹配所有子目录